How do I clear my Mac so I can sell it? You just have to reformat your hard drive and reinstall a clean version of the operating system.
It is that time again. Time to decide whether to keep or replace your Mac
The first thing you should do before hitting the streets to sell your old Mac is clear it of any and all personal data. You don’t want to accidentally sell your computer to a stranger when you are still logged into iCloud.
- Step 1: Back up your Mac
- Step 2: Sign out of everything
- Step 3: Reformat your hard drive
- Reinstall a clean Mac operating system
- If you’re selling a MacBook Pro with Touch Bar
Step 1: Back up your Mac
If you already have your new Mac on hand, you can transfer all of your data from your old Mac or use an older Time Machine backup. If you don’t have your new Mac yet, well … then you probably shouldn’t be selling your old one yet. But, if you really don’t think you’ll need your old computer before getting your new one, just make sure to back up your data so that nothing happens to it before you get what you need onto your new Mac.
- How to back up and restore your Mac with Time Machine
- How to clone your Mac
Step 2: Sign out of everything
The software you have on your Mac is licensed to you, which means it doesn’t get transferred to the new owner of your computer (except the operating system). In order to avoid complications with the new owner attempting to download and install software that is licensed by you, make sure to sign out of everything your personal information is connected to.
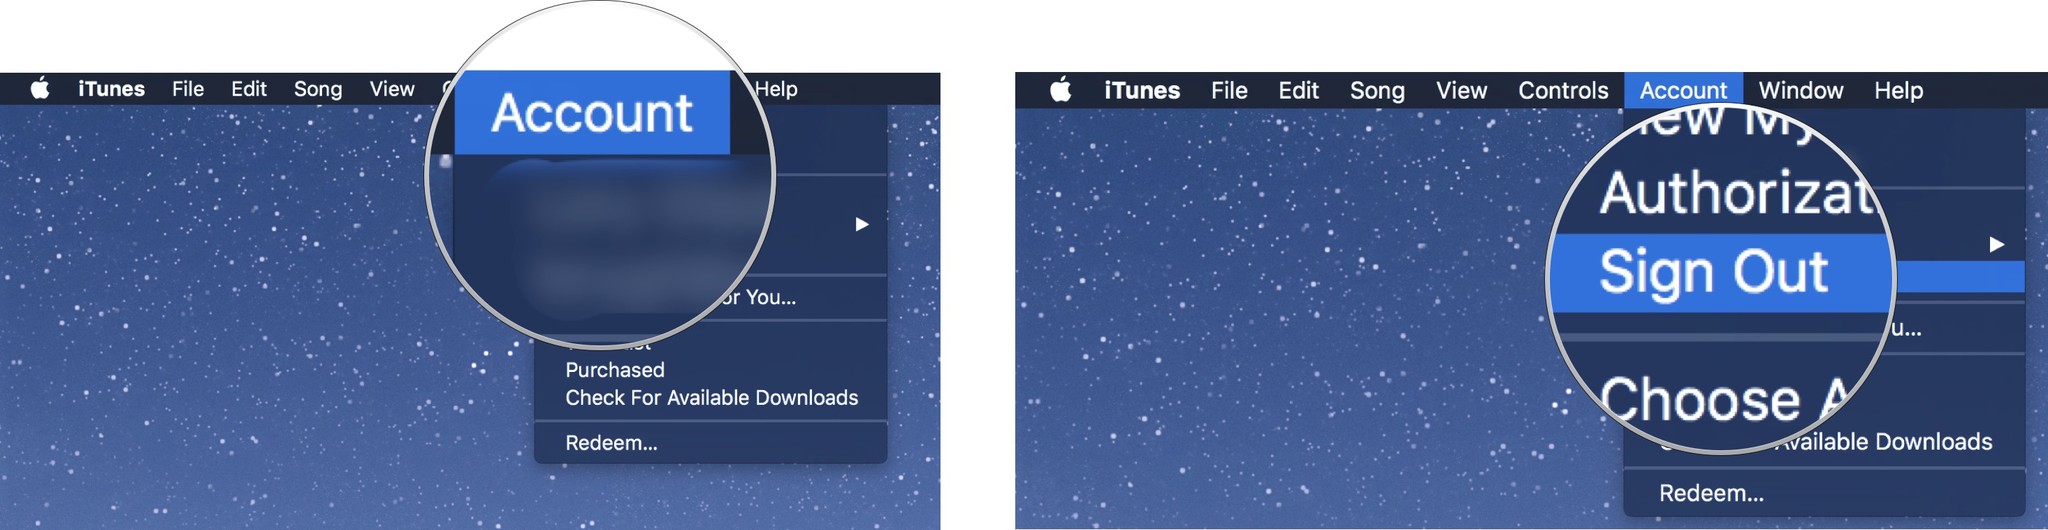
How to sign out of iTunes
- Open iTunes on your Mac.
- Click Account in the Menu bar on the left side of your screen.
- Click on Sign Out.
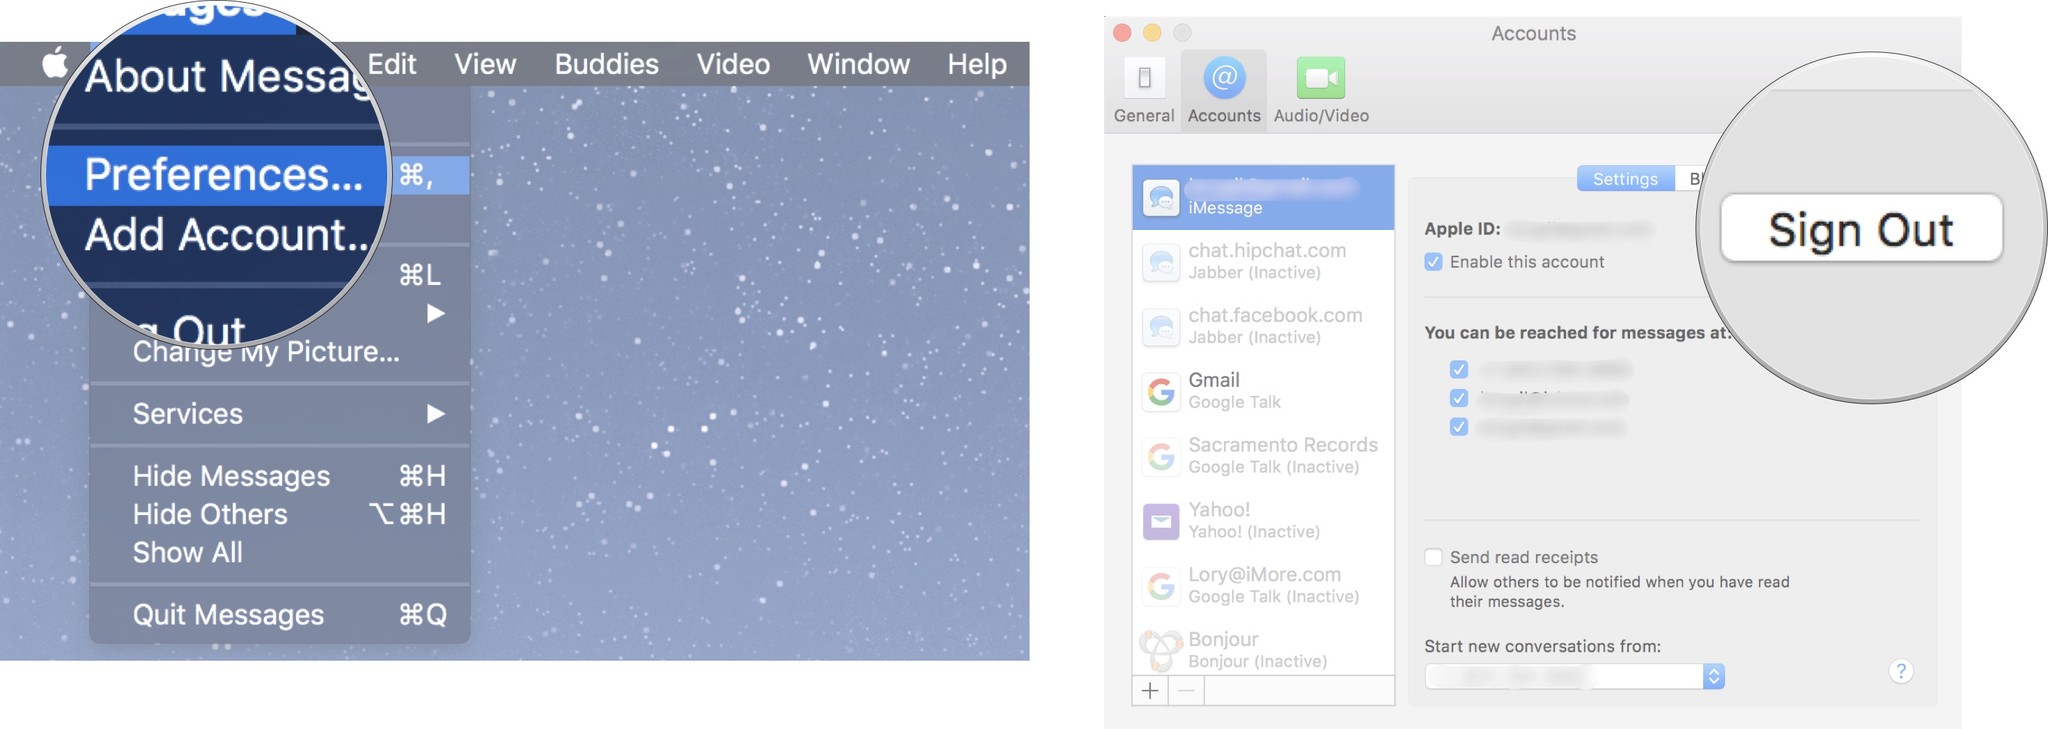
How to sign out of iMessage
- Open Messages on your Mac.
- Click Messages in the Menu bar at the top left corner of your screen.
- Click Preferences from the drop-down menu.
- Select your iMessage account.
- Click on Sign Out.
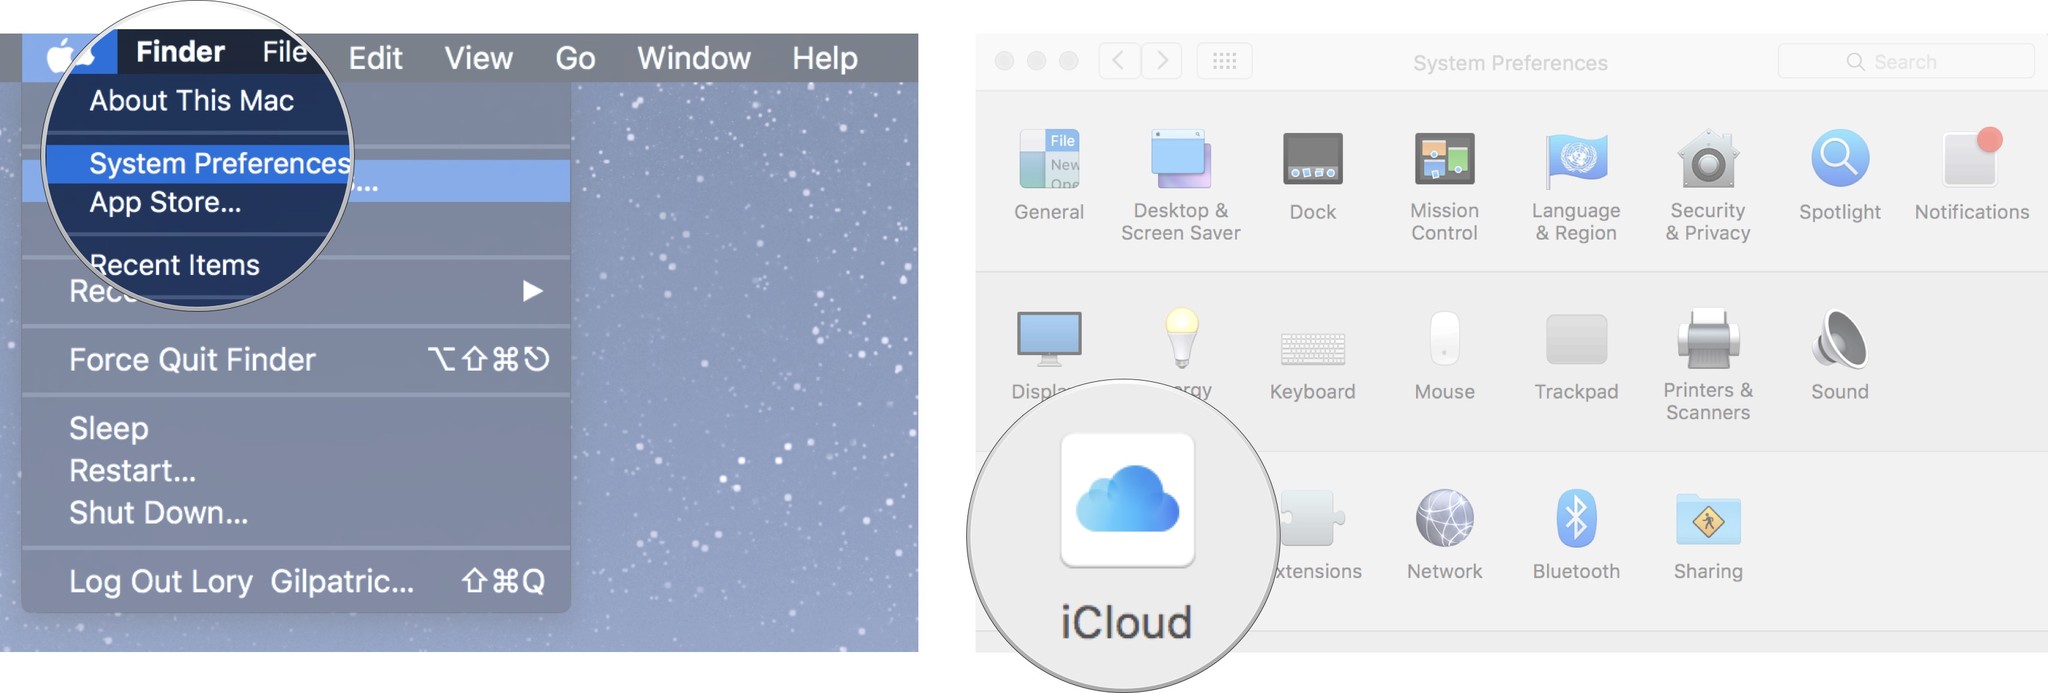
How to sign out of iCloud
- Click on the Apple icon in the upper left corner of your Mac’s screen.
- Click System Preferences from the drop-down menu.
- Click on iCloud.
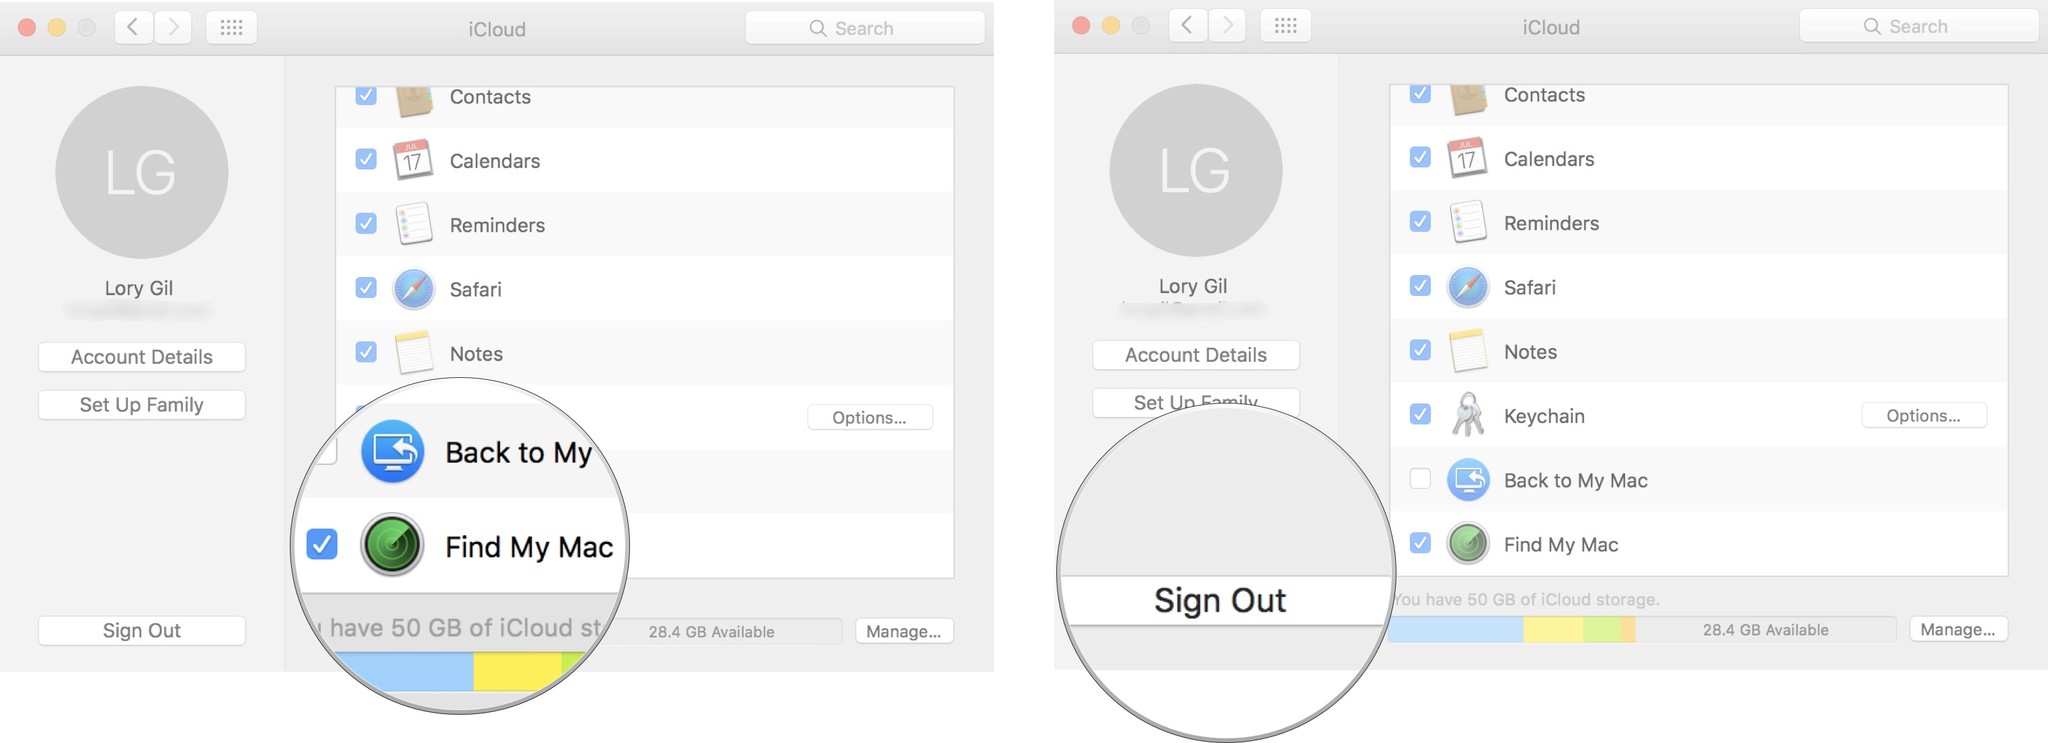
- Un-tick the box for Find My Mac.
- Enter your system password when prompted.
- Click on Sign Out.
- Click Remove data from this Mac when prompted.
Step 3: Reformat your hard drive
Once your data is backed up and you’ve signed out of everything that might connect your old Mac to your personal information, you can erase everything on it by reformatting the hard drive.
- Turn on or restart your Mac.
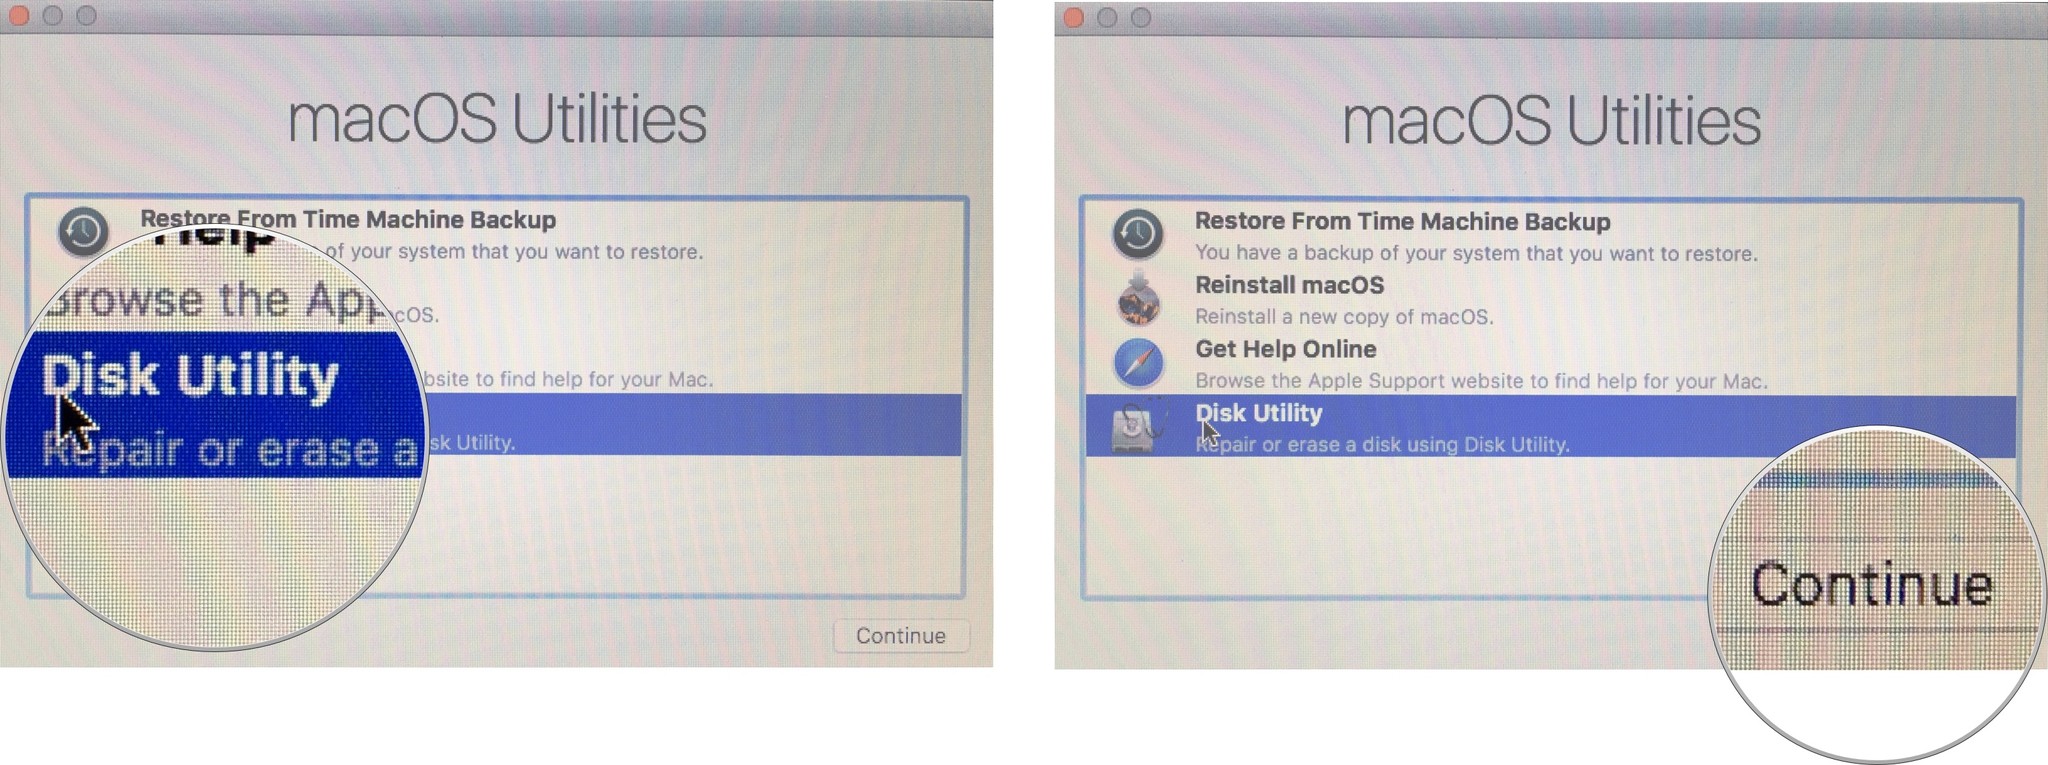
- Hold down Command and R at the same time right after you restart your Mac. Keep holding down the keys until your Mac finishes loading and you see the macOS Utilities window.
- Select Disk Utility.
- Click on Continue.
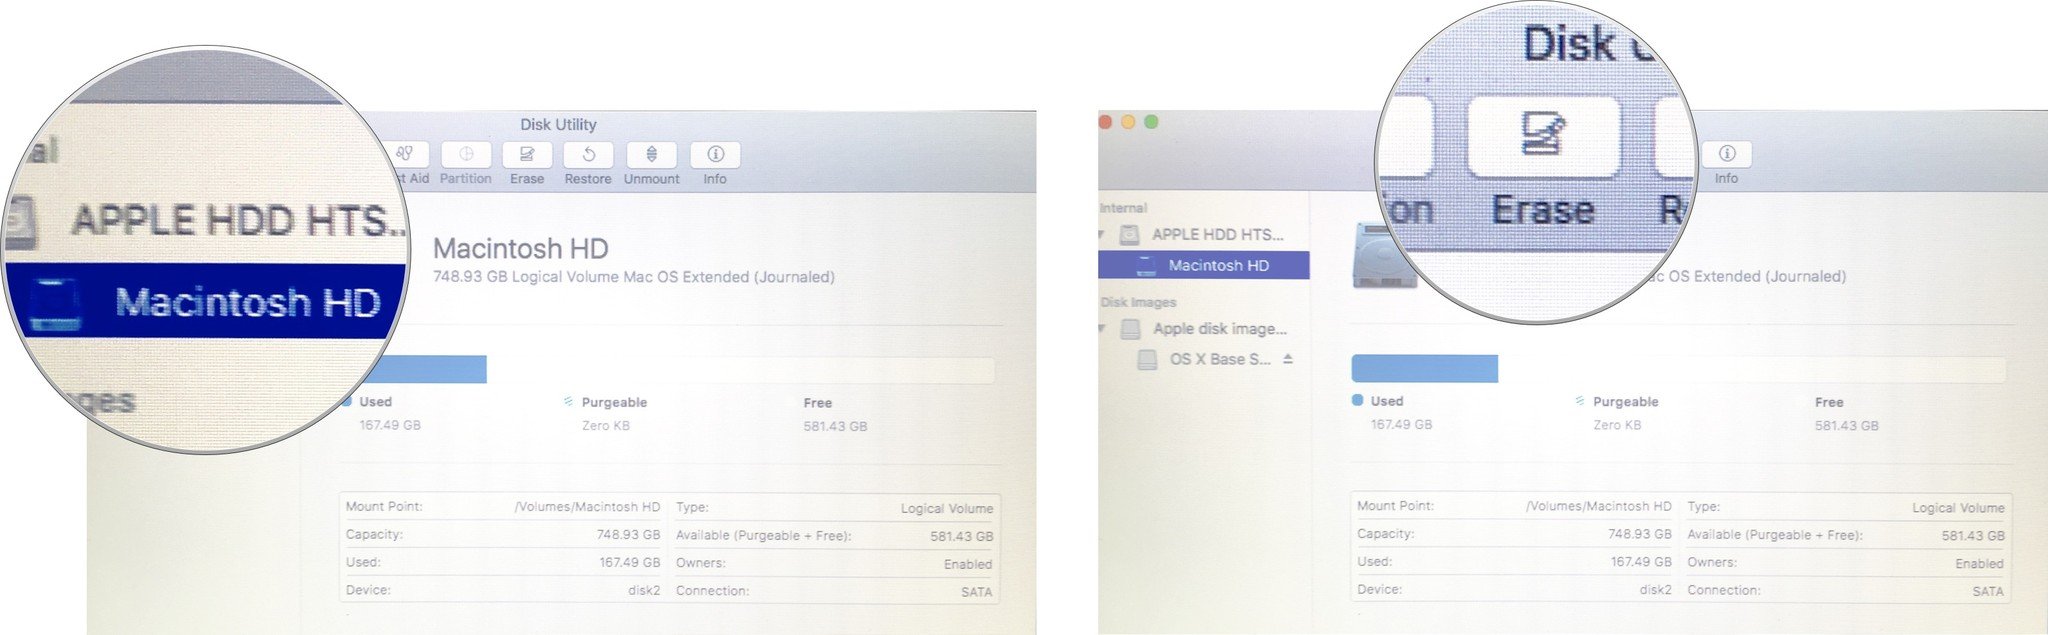
- Select your Startup disk (it is probably named “Macintosh HD” or something similar).
- Click on Erase from the buttons at the top of the Disk Utility window.
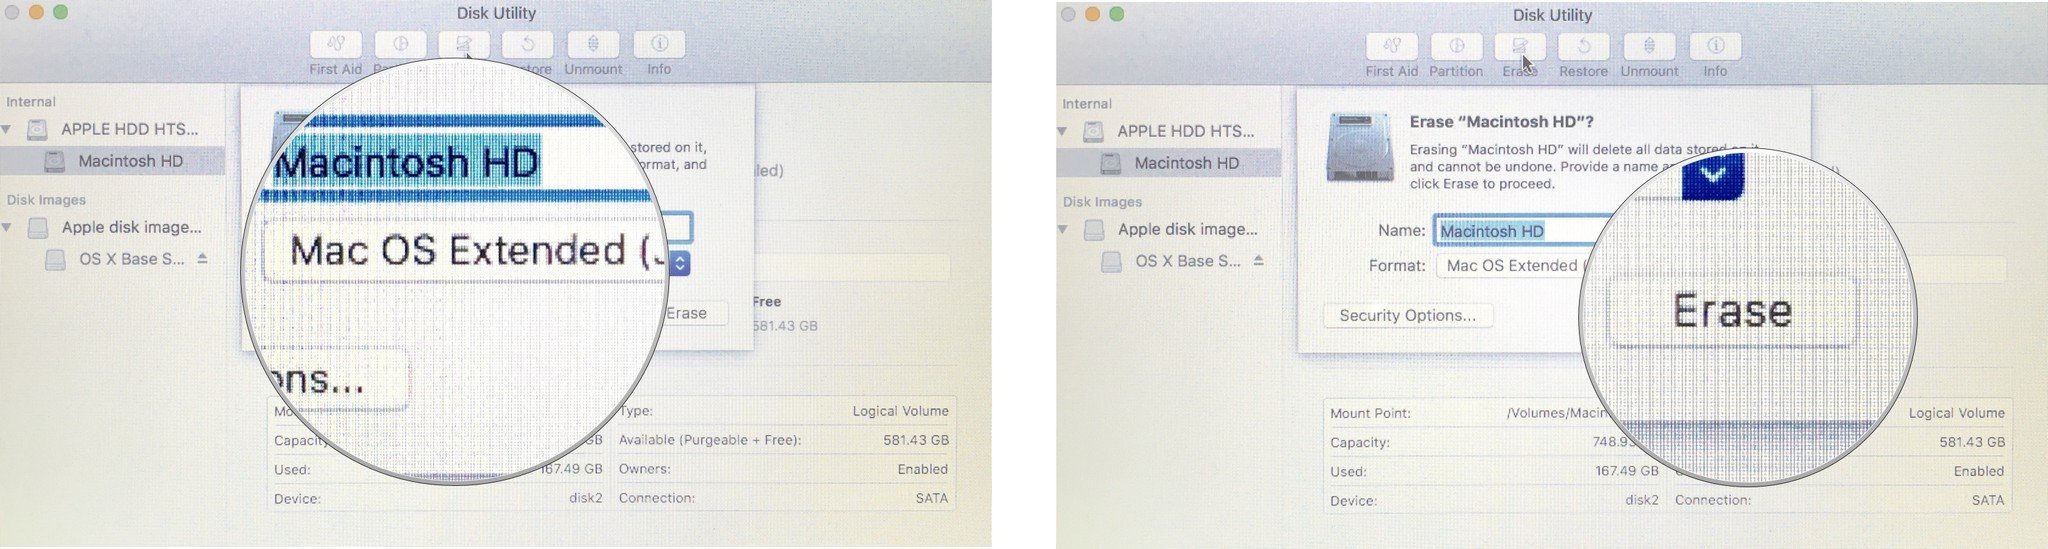
- Select Mac OS Extended (Journaled) from the drop-down menu next to Format.
- Select GUID Partition Map from the drop-down menu next to Scheme (where applicable – not ever Mac has this).
- Click Erase.
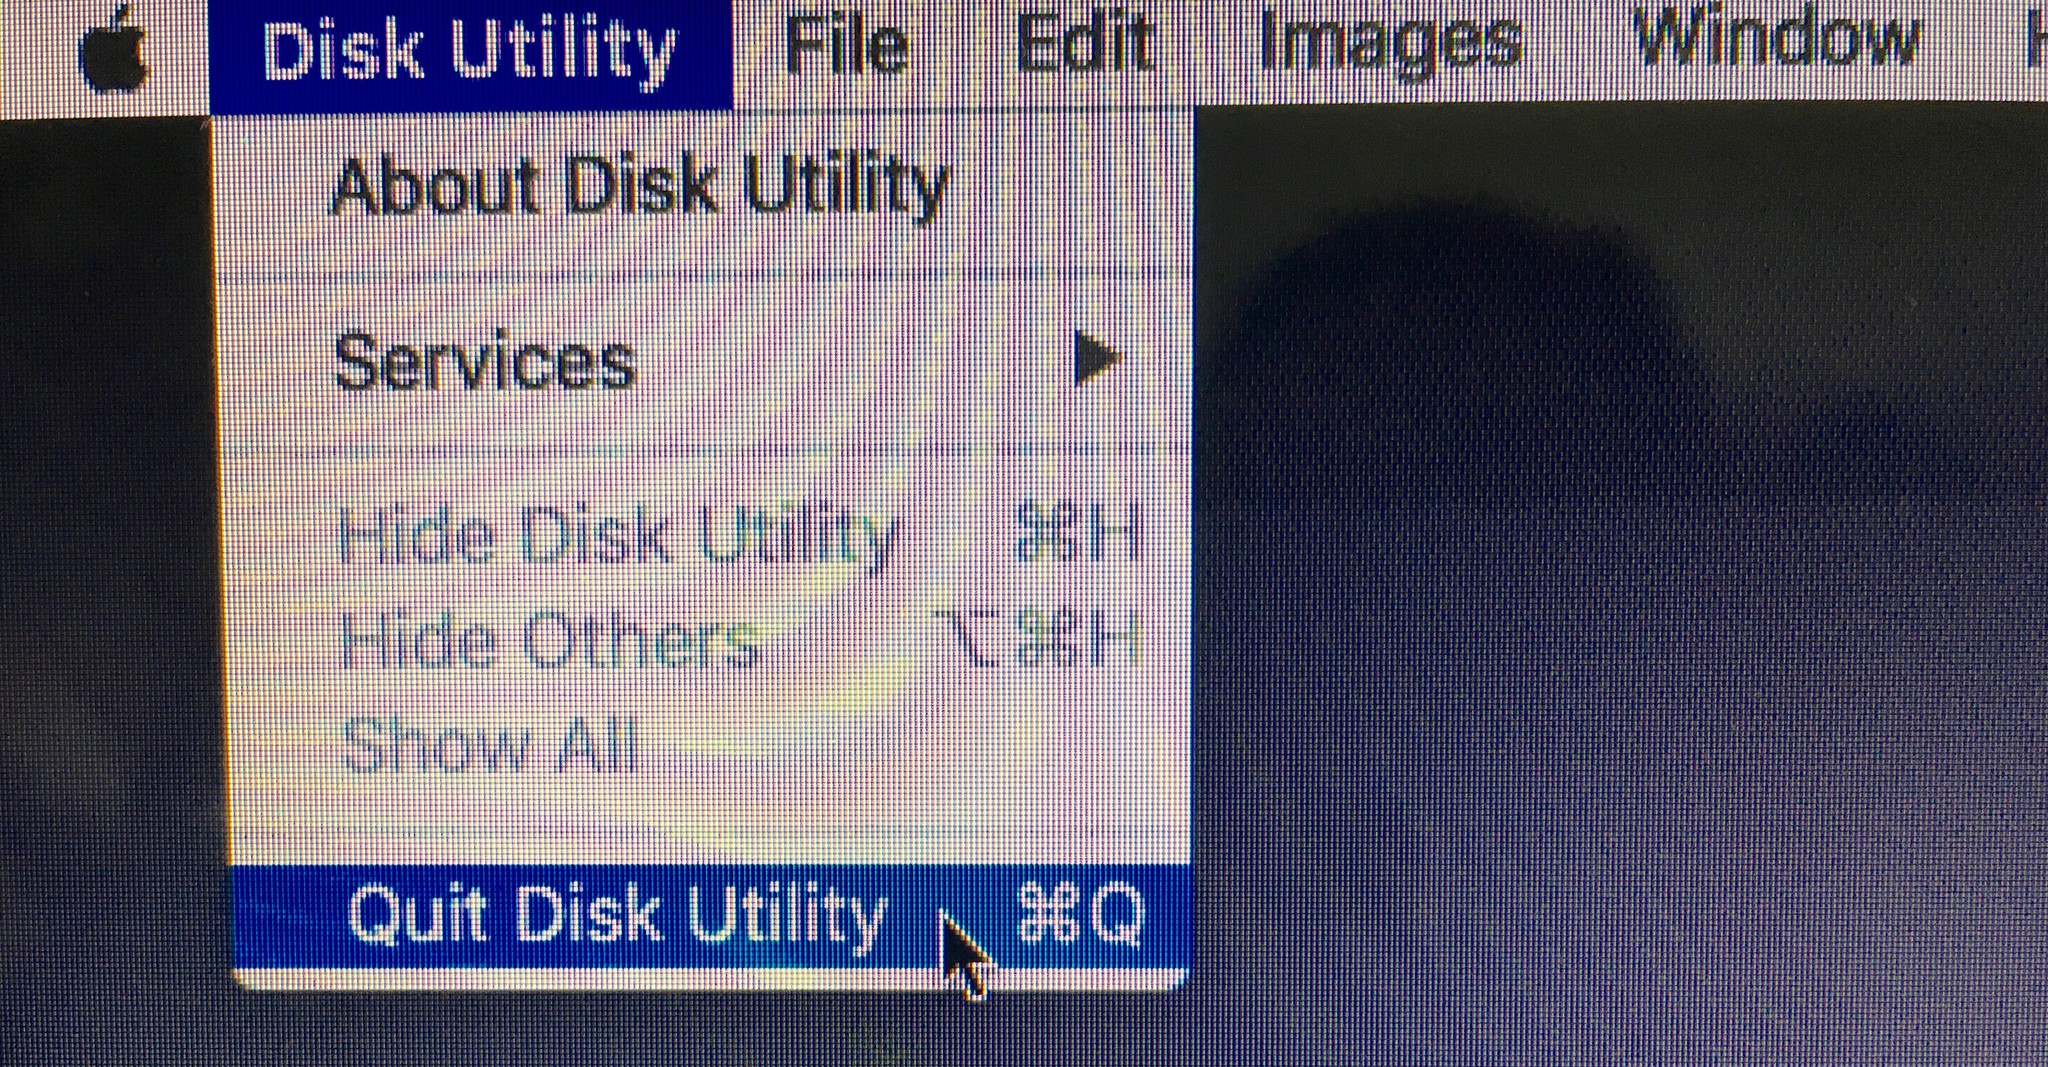
- After the process is complete, select Quit Disk Utility from the Disk Utility drop-down menu in the upper left corner of the screen.

Step 4: Reinstall a clean Mac operating system
After you reformat your hard drive it will be ready for a clean installation of the operating system. You should already be in the Utilities window after erasing your Mac. If not, restart your computer and hold down Command and R at the same time until you see the Apple logo.
Note:Make sure your Mac is connected to the internet in order to verify the software. You’ll be asked to do so during the installation process.
- Turn on or restart your Mac.
- Hold down Command and R at the same time right after you restart your Mac. Keep holding down the keys until your Mac finishes loading and you see the macOS Utilities window.
- Click on Reinstall macOS (or Reinstall OS X where applicable) to reinstall the operating system that came with your Mac.
- Click on Continue.
- Select your hard drive (“Machintoch HD” or something similar), when asked to select your disk.
- Click on Install to install the operating system that came with your Mac. Your Mac will restart after the installation is complete.
- Hold down Command and Q after the installation is complete. Do not follow the setup instructions. Leave that part for the new owner. 8 Click Shut Down to shut down your Mac.

Your Mac is now clean and ready for a new owner. They will complete the setup instructions to get started using the Mac, as well as download the latest macOS operating system that is available and supported on their Mac.
If you’re selling a MacBook Pro with Touch Bar
If you follow the steps above, the information stored in the Touch Bar of your MacBook Pro will be securely erased. However, if you’ve decided to use a third-party program or used Target Disk mode to erase your Mac, you should follow these additional steps to ensure that your Touch Bar data is also erased.
- Turn on or restart your MacBook Pro.
- Hold down Command and R at the same time right after you restart your Mac. Keep holding down the keys until your Mac finishes loading and you see the macOS Utilities window.
- Click on Utilities in the Menu Bar on your MacBook Pro. It’s in the upper left of your screen.
- Click on Terminal from the drop-down Utilities menu.
- Enter the following command into the Terminal window:
xartutil –erase-all
- Press Return.
- Type Yes when asked to confirm.
- Click on Terminal in the Menu Bar. It’s in the upper left of your screen.
- Click on Quit Terminal.
This will clear all information from your Touch Bar.